Building a widget
Custom widgets are components in pages that allow developers to create any widget in pages. These widgets can be standalone widgets or integrations with external services.
This guide shows you how to build a custom component widget. This allows you to create any kind of widget in Happeo pages as the component widgets are rendered as web components. This gives you full control on styling the widget and native experience for all using your custom widget.
How it works
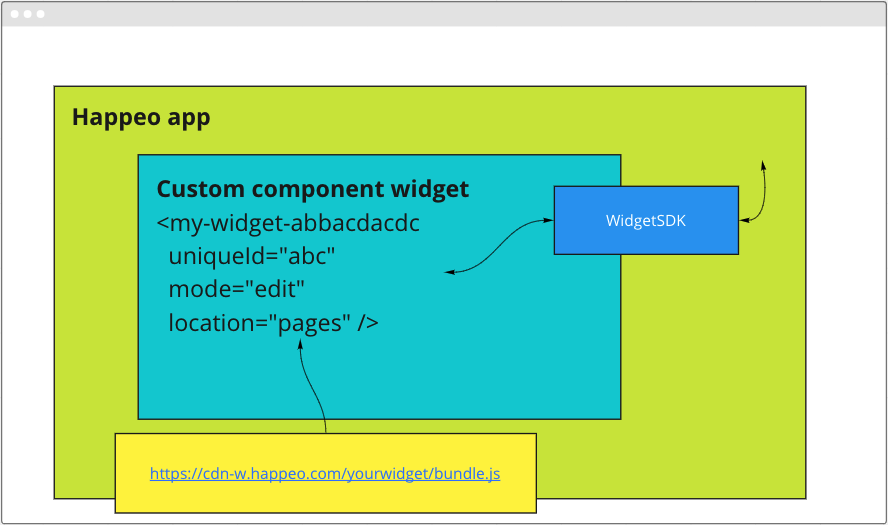
The custom component widgets work by allowing developers to upload minified code directly into Happeo's own custom widget CDN (cdn-w.happeo.com). This code is ran inside the web component designated in the custom widget creation process.
The custom widgets also have access to WidgetSDK, which gives you access to the Happeo APIs and context, such as user and organisation. Additionally you can, for example, create new setting options to Happeo pages. This creates a fully integrated experience with the Happeo's own UI.

WidgetSDK
The widgetSDK allows connecting with the Happeo's own UI and APIs. For full reference, please check our Github page: https://github.com/happeo/widgets-sdk. For the API reference, please check the WidgetSDK wiki: https://github.com/happeo/widgets-sdk/wiki/API-requests.
Examples and starter code
We've also created some examples and starting code for you to hit the ground running. You can find the examples and other resources from our Github page: https://github.com/happeo/custom-widget-templates
Start creating
To get started we first need to create a Custom Component Widget in the Happeo admin panel. Click here to start the journey.
Updated 9 months ago
Create custom widget in Happeo admin panel
